

July 19, 2026
How to Use Resistance Bands for Stronger Training
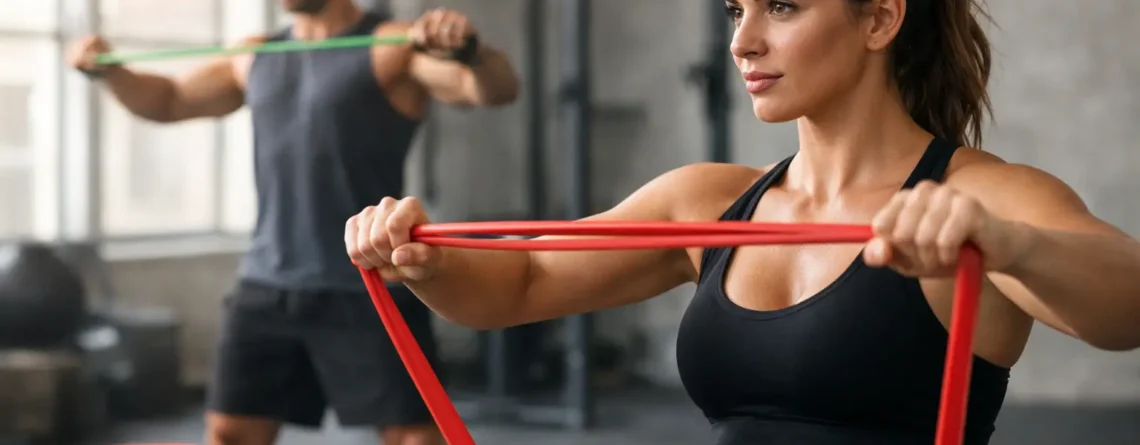
Resistance bands look simple. That is exactly why they earn a place in serious training. Once you know how to use resistance bands with control, they can build strength, sharpen movement, challenge stabilising muscles and make a solid session possible almost anywhere.
For runners, swimmers, cyclists, gym-goers and anyone training at home, bands offer a practical way to keep moving without needing a rack of weights. They are affordable, easy to pack and available in different resistance levels, so your workout can grow with you.
Start with the right resistance
The best band is not the heaviest one. It is the one that lets you complete each rep with good form while still feeling the final few reps work. If your shoulders creep up, your back rounds or you have to jerk the band to finish the movement, reduce the resistance.
Light bands suit mobility drills, shoulder work and activation exercises. Medium bands are a useful all-round option for rows, presses and lower-body training. Heavy bands can challenge squats, deadlifts and stronger pulling movements, but they demand more control and a secure anchor point.
Different band styles also suit different jobs. Loop bands work well around the legs for glute training. Long resistance bands are versatile for rows, presses and assisted stretches. Tube bands with handles can feel familiar if you are used to cable machines. There is no single best choice – it depends on your training goal and the exercises you enjoy enough to do consistently.
How to use resistance bands safely
Before every session, inspect the band. Look for small tears, cracks, thinning rubber or damaged handles. A worn band can snap under tension, so replace it rather than trying to get one more workout from it.
When anchoring a band to a door, pole or other fixed point, make sure the anchor cannot slide, open or move towards you. Pull gently on the band first to test the setup. Keep the band away from your face and avoid stretching it beyond the manufacturer’s recommended range.
A few simple habits make a big difference:
- Start every movement with light tension rather than a completely slack band.
- Move slowly on the return phase instead of letting the band pull you back.
- Keep your ribs down and brace your midsection during standing exercises.
- Breathe steadily. Exhale through the effort and inhale as you return.
- Stop if you feel sharp pain, tingling or joint discomfort rather than normal muscle fatigue.
Bands create more tension as they stretch. That means the hardest part of many exercises is near the end of the movement. This is useful, but it can also tempt you to rush. Aim for smooth, repeatable reps. Strength comes from tension you can control, not from seeing how far you can fling the band.
Build your session around full-body movement
A good resistance-band workout does not need to be complicated. Choose one lower-body movement, one pull, one push and one core or mobility exercise. Complete two to four rounds, resting for 45 to 75 seconds between exercises as needed.
For strength and muscle endurance, begin with 8 to 15 controlled reps. For activation work before a run, ride or swim, use lighter resistance and stop well before fatigue. The goal is to switch muscles on, not leave them exhausted before the main session.
Band squat
Stand on a long band with feet about hip-width apart. Hold the other end of the band at shoulder height, then sit your hips back and bend your knees. Drive through your feet to stand tall.
Keep your knees tracking in line with your toes and your chest proud. If the band pulls you forward, reset your hand position or use a lighter option. Squats target the quads, glutes and core, making them a strong choice for general fitness and leg durability.
Standing row
Anchor a long band at about chest height. Step back until there is light tension, hold the ends and pull your elbows towards your ribs. Pause briefly as you squeeze your shoulder blades, then return slowly.
Do not shrug your shoulders or lean backwards to make the row easier. This movement is valuable for balancing pressing exercises and supporting better posture, especially if much of your day is spent at a desk or behind the wheel.
Chest press
With the band anchored behind you at chest height, take a staggered stance for balance. Start with your hands near your chest and press forward until your arms are almost straight. Bring the handles or band ends back with control.
Keep your shoulders down and avoid locking out hard at the elbows. A chest press is an easy way to train pushing strength at home, but only use an anchor you trust completely.
Glute bridge with a loop band
Place a loop band just above your knees and lie on your back with knees bent and feet flat. Press your knees gently out into the band, squeeze your glutes and lift your hips until your body forms a straight line from shoulders to knees.
Lower slowly, keeping outward pressure on the band. This is a smart activation drill before running or cycling, and it can be a useful strength exercise when performed for higher reps with a stronger band.
Pallof press
Anchor a band at chest height to one side of your body. Stand side-on to the anchor, hold the band close to your chest, then press your hands straight out in front of you. Resist the band’s pull to rotate your torso.
Hold for a second before bringing your hands back in. The Pallof press trains your core to resist movement, which is highly useful when you want more stable running mechanics, stronger lifts and cleaner control through sport-specific movement.
Use bands for warm-ups, strength or recovery
Resistance bands are not only for home workouts. Their value changes depending on when you use them.
Before training, light band work can prepare the muscles you want to use. Swimmers may add external shoulder rotations and light rows. Runners and cyclists can use lateral walks and glute bridges. Keep the effort easy and purposeful. You should feel ready to train, not cooked before the session starts.
For a standalone strength workout, use slightly more resistance and train closer to fatigue. Slow the lowering phase to make lighter bands more challenging. You can also increase difficulty by stepping farther from the anchor, using a thicker band or adding a pause at the hardest point.
On recovery days, bands are useful for gentle mobility. Controlled shoulder movements, hip work and easy stretching can help you move well without loading the body heavily. Recovery work should leave you feeling better than when you started.
Progress without losing form
With free weights, progression often means adding kilograms. When using bands, you have more options. Add reps first, then add a set, slow the tempo or choose a heavier band. You can also shorten the band by moving your hands closer together or step farther away from the anchor to increase tension.
Track what you do. A quick note on your mobile after training is enough: band colour or resistance, exercise, sets, reps and how hard it felt. When 15 reps feel clean and manageable for every set, it is probably time to make the exercise slightly harder.
Do not progress everything at once. If you add resistance, keep your sets and reps steady for a week or two. This gives your joints and technique time to adapt. Consistent training beats heroic sessions followed by a sore fortnight off.
Make resistance bands part of your routine
The biggest advantage of bands is that they remove excuses. Keep a set near your training shoes, in your gym bag or at home where you can see it. Ten focused minutes after a ride, between meetings or before dinner can still move your training forward.
For affordable training gear that fits real routines, 4Sports offers fitness essentials designed to help Australians train with purpose. Choose a resistance level that matches where you are now, focus on clean reps, and let each session build the next. Small, consistent effort is where endurance meets triumph.